Sunday 11 December 2011

December Works In Progress

Hello Everybody,


I thought I'd fill you in a little on my December Works-in-Progress. 


The first item on the agenda are my hand warmers. They're being made using another Fibre Flurry purchase from Artist's Palette Yarns. It's called Merino Cashmere DK and is 80% super wash merino, 10% cashmere and 10% nylon. It's really soft and I love the colour. The pattern is called Midnight - with a Twist! and again, I stole the idea of making these from a friend at Cannock Crafties craft group. They are relatively simple (as long as you're not nattering too much at craft group unlike me!) and have some pretty cables on the front. I haven't finished them yet, but I have done the left hand at least! I aim to have them finished pretty soon, so watch this space.


The next project I'm currently working on is a shawl called Multnomah. It's named after Multnomah county in Oregon, USA. You learn something new every day. I think the inspiration behind the name was to do with the colour way - it was originally in a variegated green, representing the vegetation of Multnomah county! Well, my Multnomah is not in green, more of a turquoisey-blue, so maybe I should think of another name. Maybe I should go for a British county, not sure many are turquoisey-blue though. The yarn was one of the main reasons that I wanted to go to Fibre Flurry, as I knew Easyknits would be there and I was desperate to get my hands on some glittery yarn. It's all about the glitter these days, don't you know, and we even drink it at craft group! I think it's for the best not to question where the glitter ends up. Anyway, there was lots of glittery yarn as it happens but my favourite was still the Easyknits Twinkle. I bought a skein in the Frozen Lake colour way (4-ply) (currently on sale!) and a lace weight one in another colour way. I hope it turns out ok, I haven't got very far with it yet. I thought it would be a good train project because (the first part, at least) requires little thought.


I just love how it sparkles in the light!

Thistle Girl x

Saturday 10 December 2011

Owl Hat

Hello Everybody,


Two posts in one day- wow it must be a Christmas miracle. Just wanted to tell you about a project that I'm actually quite happy with - a hat. Now, normally I have a bit of trouble with hats - getting the size and shape correct. I have had a few successes but a few failures also. One most noticeably last year when, inspired by a friend who was also making one, I decided to make a Phannie. Yes, you heard that correctly. I'll say it again, because it amuses me slightly. Phannie. Now, on Ravelry it states that over 900 people have made this so it's pretty popular. Some have turned out fab, others are er... interesting. Mine was in the 'interesting' category. I made it with some nice yarn, Freedom Spirit, in a purple/pink colour way but when I had finished it, it looked like well goodness knows what. I tried it on, and it looked even worse. I threw it across the room and then hid it. I haven't even been able to get it out to frog it. Unusually for me, I didn't even take a photo. I may traumatise you with one at some point though. Anyway, this is a very long winded way of saying that I wanted to make a hat. I wanted one that was the right size and shape and that (hopefully) no-one else on my train would be wearing. It seems everyone is wearing bear/panda/cat hats from high street chain stores, which are very cute but I wanted something different. 


So, after a bit of searching and hunting around Ravelry, I eventually settled on a hat design called Who?, which incorporates some cute cabled owls. The Ravelry page for the pattern is here (it's free!) and my Owl Hat project page is here.


I used yarn that I bought at Fibre Flurry 2011 but I can't really remember who I bought it from or what it is as it was in a bargain bin and unlabelled. I think it's an alpaca mix and approximately 4-ply, it's a hot pink vibrant colour. I use a 3.25 mm circular and after a few rows it was looking a little loose. As I was worried about going down a needle size (the pattern actually called for worsted weight and 4mm needles) as I thought the hat would be too small, I just held the yarn double which seemed to work quite well. 


The hat knitted up really quickly and only took me a couple of days. The cabled owls were really easy and stand out fairly well, although they would be more prominent in a bulkier yarn I should imagine. Although others had only put buttoned eyes on one or two owls, I thought this was the cutest bit so put them on all my owls. I also added a pompom for goo measure, although it was properly more trouble than it was worth!


Here is the finished result:


It's a slightly strange shape as it's stretched around a light! The first few rows of the ribbing are a bit looser as I didn't want to frog and start again so left them as single held yarn.


I think the buttons are pretty cute. They're quite tiny and in various shades of purple and pink with some polka dots. They're the Papermania capsules Mini Buttons and I think I mixed up a couple of packet colours. I bought them from Hobbycraft a while ago but you can get them from various places online - think they might be these ones.


So, what do you think? Has anyone else made one of these owl hats? If so, please show me. Also, I'd be interested to hear about other cute but fairly foolproof hats so I can build a collection and have a warm head all winter long. Apparently, there's also some matching hand warmers or mittens on Ravelry but I'm going to finish the pair of hand warmers that I've started first!

Thistle Girl x


Show and Tell Part One

Hello Everybody,

Well, it's certainly been a while since I last blogged hasn't it? Naughty. Winter is definitely settling in at Thistle House and we had a very frost this morning and even a few flakes of snow earlier in the week. My non-hardy plants such as my olive trees are all cluttering up my windowsills and other surfaces in the house. I'll be glad when it's warmer so they can go back outside, won't be for quite a while yet though. 


I've got a fair few things to show you, and I'll try and write as many posts as I can this week. I felt it was only right to show you the my completed (yes, you heard correctly) Baktus, as I've been working on it for nearly a year but kept on forgetting about it. As I said in a previous post, it's made with Araucania Ranco Multy, which is a little scratchy but I'm hoping it will soften up with use. It's a little tricky to photograph, as it's quite big, but I'm sure you get the gist. You can see it on my Ravelry page here


Anyway, that's it for now, I'm off to make my overdue Christmas Cards. Will post more later (hopefully).


Thistle Girl x

Thursday 1 September 2011

{insert name here} the Singer Sewing Machine

Hello Everybody,

Well, yesterday I promised that this week I would introduce you to my sewing machine, and here she is:


She's a 1933 No. 99 model Singer sewing machine that my Great Aunt gave me a couple of years back as she no longer uses it. My Mum has one just like it that I used to have a go on when I was younger. I'm afraid to admit it, but this little beauty has been left all alone in my dark (and probably slightly damp (!)) garage for at least 2 years. She comes with a little wooden cover but is heavier than she looks. From her serial number, I can tell you that she was made in Clydebank, Scotland - isn't the internet amazing? Not that that's a huge surprise, because I think that was the only place they were made in the UK!

After brushing off all the dust and cobwebs and admiring her for a good while, I had a look in the diddy little compartment on her right hand side, just under the wheel. In there I found a little green cardboard box with Singer written on it, and inside were some needles and random bits of metal. I expect these are all attachments, but I will need to investigate further.


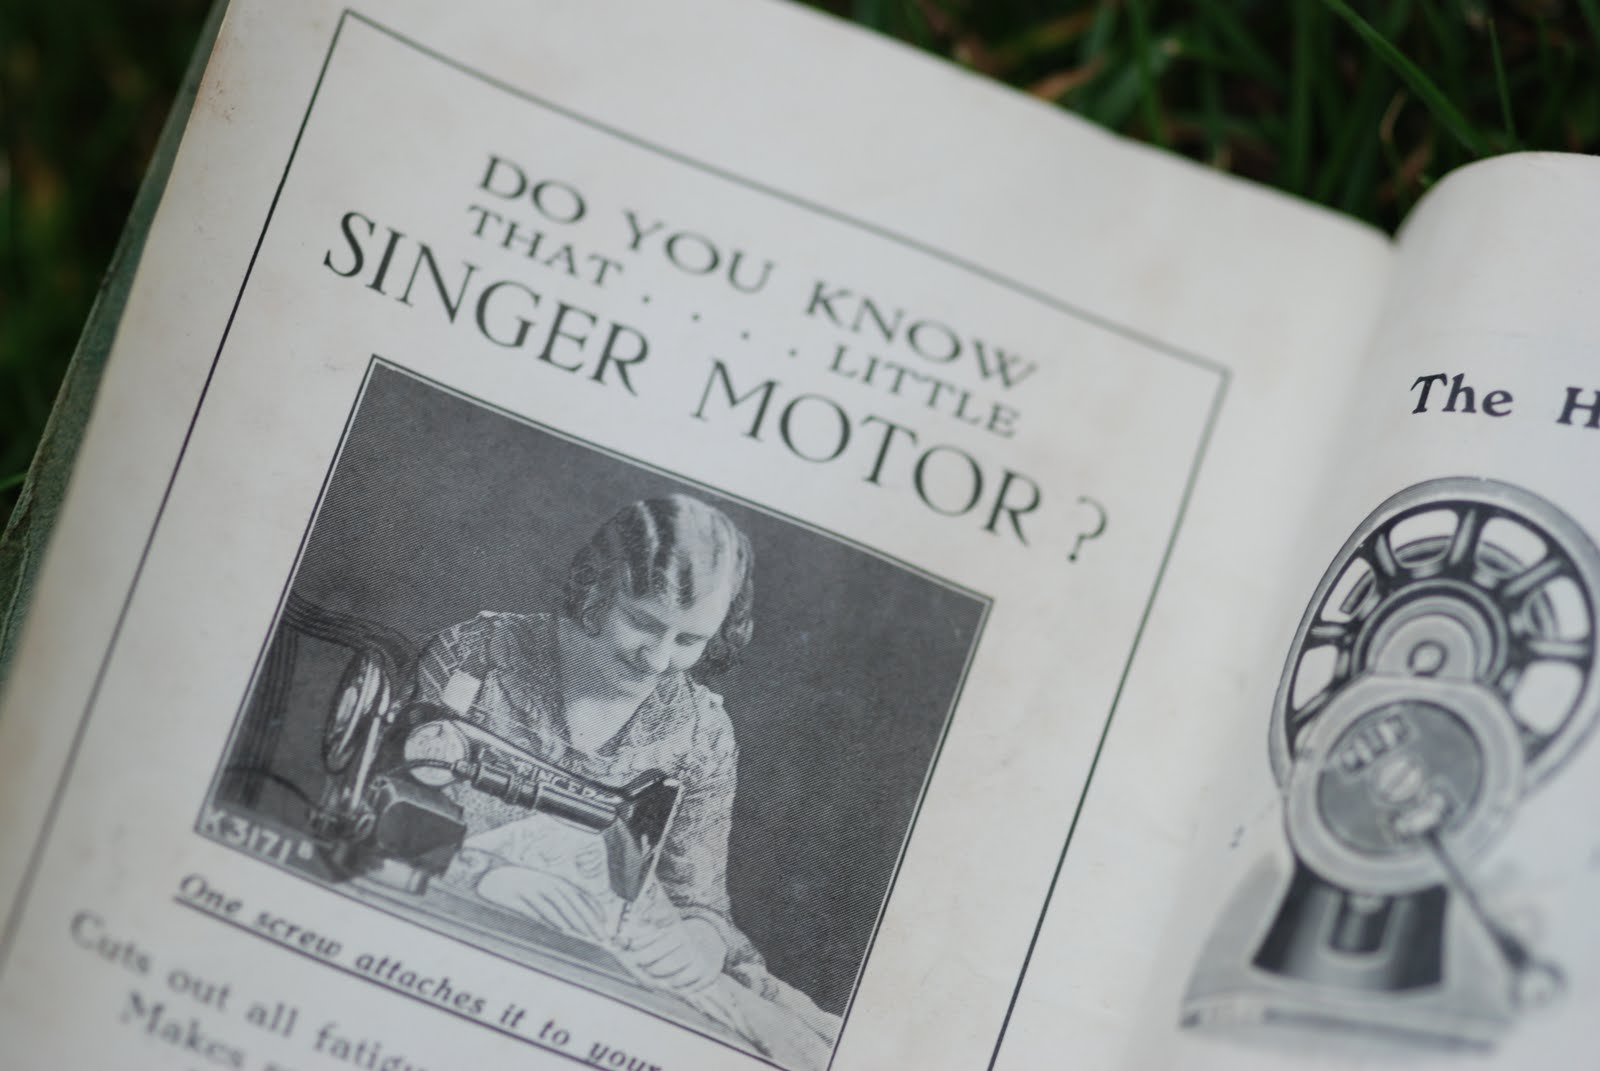
Under the little box I was most delighted to find the original manual from 1933, in pretty good condition! I was really worried that I wouldn't know how to set her up and how to use her but the manual is beautifully illustrated and (relatively) straightforward to follow. 


At the back of the book, it tells you about all the attachments, which I believe were available to buy separately. I managed to work out what most of my metal bits and pieces are - various hemming devices, a buttonholer (or well at least I thought it was until I look at pictures on this blog, may need to do some further investigation) and a ruffler. Not sure what I'm going to ruffle, but I sure do wanna ruffle something!


She also can with a random piece of wood, which I eventually worked out was some sort of extension leaflet.


My Great Aunt has kept her in pretty good nick, as a quick polish with a a wet wipe and she was all shiny again. I love all the details, like the metal end plate.


So, after admiring her I decided I had better test her out. You should all bear in mind, that I can count the number of times I've used a sewing machine on one hand. I went to an all girls school and they banned needlework lessons when I was 12 (I went to a mixed junior school up to the age of 11 where we did a bit of hand sewing but not much else) as they thought they were sexist, so we hadn't even got past the health and safety lectures . I remember hunting in the 'rag cupboard' at school for scraps, but don't even remember turning a sewing machine on. As a result, I am completely useless. My Mum did try to teach me at some point, in all fairness, but aged 15 when asked to sit down with an antique sewing machine I was not particularly keen (to put it mildly). However, I decided it couldn't be that hard, I'm not a completely stupid person (no comments, please) so where's the harm in trying?


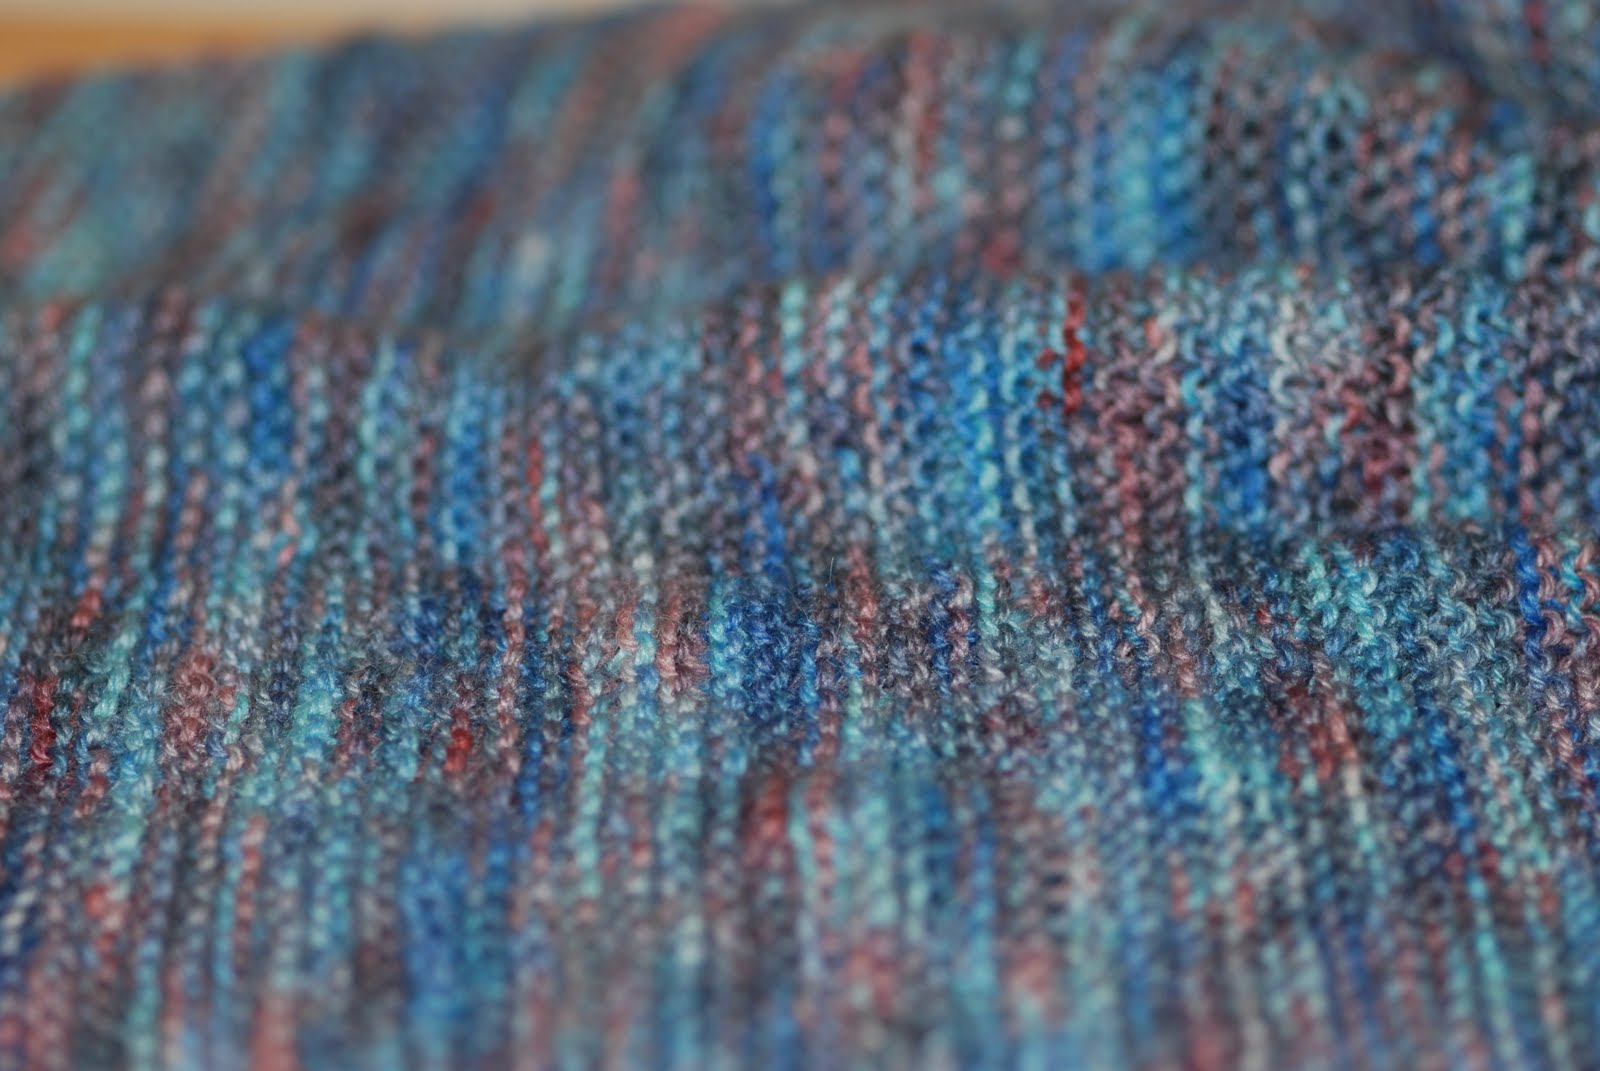
Armed with the ancient manual (and, thankfully, a diagram), I pulled the thread through, over and under almost endless springs, wires and eyelets. This bit is a lot easier said than done - it is very fiddly. I worked out how to move the foot thingy up and down and how to catch the thread with the bobbiny thing underneath. Good job there was already thread with the machine, because I'm not sure I have any!!! Sure, I have the odd bit for emergency repair work but no great collection (another fab excuse for a craft shopping outing methinks). So, I grabbed a scrap of old curtain lining and gave it a go. Here is a picture of my first wonky line, I figured I can only improve.


I think me and my machine need to do a bit of bonding!


So, there you have it - my first sewing machine adventure. Does anyone else own one of these machines? If so, I'd love to hear from you, if you have any advice? 


More importantly, this little girl needs a name - any suggestions? Do people name their machines? I tend to name everything, even the spiders in my house have names (yes I'm talking abut you, Eric!). What are your machines called?


Thistle Girl x

Wednesday 31 August 2011

Work-in-Progress Wednesday #1

Hello Everybody,


Well, I promised myself that I'd participate in Work-in-Progress (WIP) Wednesdays as per the Tami's Amis Blog, so here goes!


I've got lots of unfinished 'in-progress' things on the go at the moment. I've been bit slow on the old knitting and crocheting of late, but I'm trying to get back into the swing of things. Hopefully now it's getting colder and the nights are drawing in I'll feel more like doing yarny things. 


Anyway, the WIP that I would like to tell you about this week is my Baktus. This is a popular pattern on Ravelry, but I hadn't really heard of it until a friend at my knitting group was learning to knit and decided to make one. I thought this was the perfect, quick and easy project for my train journeys to and from work etc. However, several months later (I started 28th January!) I am not even halfway through. I thought posting about it on here might guilt-trip me into trying harder to complete it. Although it is very simple, I tend to talk a lot whilst knitting (actually, I talk a lot in general) and I keep on losing count on which row I am on. Yes, I know - I could write it down or use some sort of nifty device, but I simply cannot be bothered. So, the increases have happened on random rows, there are dropped stitches and purls (it's garter stitch). But, despite all this, I still quite like it.


Why do I like it? I think it's actually the yarn that I like. It's Araucania Ranco Multy in colour way number 302. I love the combination of blues and purples, my favourite colours. It's a 4-ply yarn, 75% wool and 25% nylon, which I bought in June 2010. I've been struggling to find the right project for it ever since. I tried to crochet a shawl with it, but it really didn't complement the dye pattern. I'm much happier with it being knitted up.


There is light at the end of the tunnel though! The pattern calls for you to knit up half increasing, then start to decrease. It's a 100g ball at there's 55g left so nearly halfway. I'm excited to start doing the decreases, wish me luck - maybe I'll be finished by the time the properly cold weather starts, maybe not.


Also on this WIP Wednesday I have taken my first peek at an old Singer sewing machine that was given to me by my great aunt, but I'll tell you more about that later in the week. Can't have too much excitement in one day! ;-)


Thistle Girl x

Monday 29 August 2011

Making Monday #1

Hello Everybody,


Today is Monday, and as it's a Bank Holiday and I'm not at work, I thought I'd have a go at this Making Monday thing. So, this is just a brief post to let you know what I've been up to. 


I've actually been making lots today, oil painting, sewing, porcelain painting, mess. Unfortunately (or maybe fortunately) I am unable to show you any of those things as they are either still works in progress, complete fails or presents, but I will one day (maybe not for the fails)!


In the meanwhile, I decided to clean out my fridge and discovered that I had a load of chocolate and mangoes that needed using up. I googled and browsed a few blogs looking for an inspirational recipe, but found none to my liking. So, I decided to CREATE! What followed were some strange child-like concoctions coupled with a silicon ice-cube tray.


I blended the mangoes with some random items, such as chilli, hazelnuts, porridge oats, sugar and a vanilla pod. Then I wanted to make it more vanillary but had ran out of vanilla essence so added that vanilla syrup stuff Italians (and Staffordians it would seem) put in their coffee. It then tasted a little like Play-Doh so I added some more sugar to make it taste better! I just melted the chocolate. Then, I poured it into the ice-cube mould and put it in the freezer. A couple of hours later- ta-dah - Chocolate Mango Brains!


Hope you enjoyed my first ever Making Monday, can't promise there'll be any more but I will try. Does it count if I make it at the weekend and blog on Monday???


Check out the comments on Natalie's Blog for links to what other people have been Making this Monday. 


Thistle Girl x

Sunday 28 August 2011

Scribbles and Green Stuff

Hello Everybody,


Today has been an odd day, no real structure! Got lots done but still lots to do. Hopefully, one day I will have a clean and tidy house (I live in hope).


I was inspired (via Pinterest) by this blog, to create some crayon art. Cheap and simple, I thought. So, when I saw a little diddy canvas in my local supermarket for 99p, I couldn't resist. It's only very small, but I thought it would be good to try it out before wasting time and money on making a larger one. I already had some cheap wax crayons in from the bargain store.


So, I set to work and created. First of all, I cut up some crayons to fit the canvas. I chose blues and purples as I wanted to put something in my beachy room. I floated the papers off the crayons by putting them in a bowl of warmish water for a bit. Then, I attached the crayons to the canvas using a combination of double-sided sticky tape and tacky glue. I left them overnight to set. This morning I took to them with a hairdryer. Other blogs have used heat guns, but since I don't have one and the blog I referred to earlier used a hairdryer successfully, I thought this would be my best option. So, I laid out the canvas on some paper and attacked it with the hairdryer (my brand new hairdryer I should add, my old one broke yesterday!). This was much easier said than done. I had to get close to heat the crayons but even on my hairdryer's lowest setting the wax was blowing everywhere. The wax seemed quite watery and the different colours melted very unevenly, but that could be something to do with the fact that they were unbranded! Well, I finished it. It's OK, I quite like it and all its imperfections. Not quite what I was going for, but hey-ho.


So, that was that. I then decided to sort out my tomatoes. I'm growing a combination of tomatillos, hundreds and thousands and stripy tomatoes in a little plastic covered grow house. Unfortunately, tens if not hundreds of caterpillars (I googled them, they're the Bright-Line Brown-Eye moth variety) have moved in and are eating them. Leaves, stems, fruit - the lot. I decided that I needed to get tough and sort it out, otherwise I will have been growing them for months for nothing! I had a big cull, the caterpillars are no more and the plants have been rid of all their holey leaves. I also moved them to somewhere slightly more sunny, to try and ripen them up. Unfortunately, I also knocked some off whilst re-adjusting their living quarters so I'm trying to ripen them indoors!


And here are the ones with caterpillar damage. Apparently, they are also known as the tomato caterpillar- I can see why!


But don't worry, there are still a few juicy ones left - I hope these are going to turn into stripy ones!


Remember I said that I collected some moss from my parents' house yesterday? Well, I spent some of the afternoon busying myself with a project using some of the moss that you may well see here in a few months. I also used it to transplant onto a stepping stone. I've got some left, so I might make some moss juice and do some painting tomorrow! I'm not sure whether the moss will work transplanted onto the 'stone' as it's man-made, not natural, and I'm not sure how porous it is. Still, worth a shot!


Then I was dirty, so I had a bath. My friends at work gave me a Baby Bot bath bomb, it was nice.


Here's Baby Bot Before:


And after- Baby Bot is no more!


Night everyone,


Thistle Girl x

Summer Rain

Hello Everybody,


Today I have spent the afternoon visiting my lovely parents, who live on the other side of Cannock Chase. For those of you not in the know, the Chase is mainly a forested area in Staffordshire, measuring about 26 square miles. It's a designated Area of Outstanding Natural Beauty (AONB) and there are lots of deer and other wildlife. It has lots of weird things there such as glacial boulders, war memorials, and even tales of dangerous beasts!!! 


This is a photo that I took back in winter. I haven't really been on the Chase in a while, although I really should. Guess it's true that you don't appreciate the things that are on your doorstep.


Anyway, at my parents' house there was torrential rain for much of the day but me and my Mum did manage to spend some time in the garden, where we did some hazelnut picking. Unfortunately the pesky squirrels had got to most of them, but there were still a few left for us.


Whilst I was there, I acquired an old hanging basket for an upcoming project and some moss (for a different project). Since reading Rachael's Squiggly Rainbow blogpost about creating art with moss, I've been yearning to create my own mossy masterpiece. Sadly, I don't really have anywhere suitable in the garden to paint a mossy picture. I don't want to ruin my housebricks (they're south facing at the back anyway so would probably get too hot) and I'm worried that my fence will rot. So, I thought maybe I could do some designs on terracotta pots and maybe on my patio stones. We'll see. 


As the rain resulted in us having to venture inside and abandon the gardening, I decided to scan in some old photographs that my Great Aunt and Uncle had given us a few weeks before. There were hundreds of splendid old black and white photos, of activities ranging from gardening to sunbathing (mostly all whilst very poshly dressed!!!). I'm collecting some old seaside snaps and I'm planning to do something with them to decorate my 'beach-themed' spare bedroom. 


This is just a quick montage of various relatives enjoying themselves on the beach. The little girl at the bottom is my Mum! I love how they all look so happy and are enjoying and appreciating England. These days we all seem so desperate to go abroad, it's a bit sad. I think most of the shots are from Cornwall, Devon, Isle of Wight and Kent beaches. 


Well, that's all I've got to say for now. It's the late August Bank Holiday weekend here in England (and Wales, not sure about Scotland/NI!!!), so that means more RAIN. Still, it's good for the garden (yes, I'm getting old).


Thistle Girl x

Tuesday 23 August 2011

Introducing...

Hello Everybody,


In all the excitement of starting a new blog, I forgot to introduce you to someone very important in my life. Please meet... Starry Mug. 


He has lived with me for around 7 years now and is a very good mug. Keeps the heat in, but not so much that the drink stays too hot! And obviously, he's decorated in lots of pretty multicoloured stars. He holds lots of tea and coffee and is the main cause for me needing the loo nearly every morning on the train. His favourite day is Sunday, when he gets filled with steaming hot coffee from the Coffee Machine and the frothy milk gets a random cocoa picture (usually unrecognisable but I made a special effort for this photo (it's a star, btw!)) sprinkled on top. 


Starry once had a friend called Spotty, who was like him but slimmer and taller. Unfortunately, due to poor  workmanship (by a British company who shall remain nameless) he split when I added hot water (awesome design!). He now has the important duty of holding my knitting needles. Don't worry though, Starry still has a friend - Stripey! Also taller and slimmer, but they don't get on too well :-(


Anyway, that's Starry Mug!


Thistle Girl x

Saturday 20 August 2011

Hello World!

Hello Everybody,

As you may have guessed I have started a new blog, so just thought I'd write a quick post to introduce myself. 


I am a born and bred (apart from a brief detour to Wales) Staffordshire Lass, who is still the right side of 30 but not for much longer! I live on the outskirts of a town in Staffordshire, Central England. 


This is where I live:


I hope to blog about the good things in life and concentrate on things that are fun and make me happy.


So, my blog will sometimes be about where I live: Thistle House and sometimes about Thistle Garden. I will probably at some point ramble on about my hobbies - including knitting and crochet! I can't guarantee I'll have anything interesting to say, but maybe you will stop by and say hello once in a while!


Anyway, that's all I've got to say for now.


Thistle Girl x